Vitis AIのクイックスタートをはじめてみる
Xilinxドキュメントの環境のセットアップをみる
Vitis-AIをダウンロードする
[HostPC]
cd ~
git clone https://github.com/Xilinx/Vitis-AI
cd ~Vitis-AI
git checkout v3.0
Docker環境をダウンロードする。Xilinxの手順書だと、latestをpullするが、再現性を担保したいのでTagを指定してpullする
[HostPC]
docker pull xilinx/vitis-ai-tensorflow-cpu:ubuntu2004-3.0.0.091Boardの設定ということで、「Setting up a Zynq UltraScale+ MPSoc Target」を参照する
https://xilinx.github.io/Vitis-AI/docs/board_setup/board_setup_mpsoc.html
Setp2にしたがって、KV260のSD Card Imageをダウンロードする
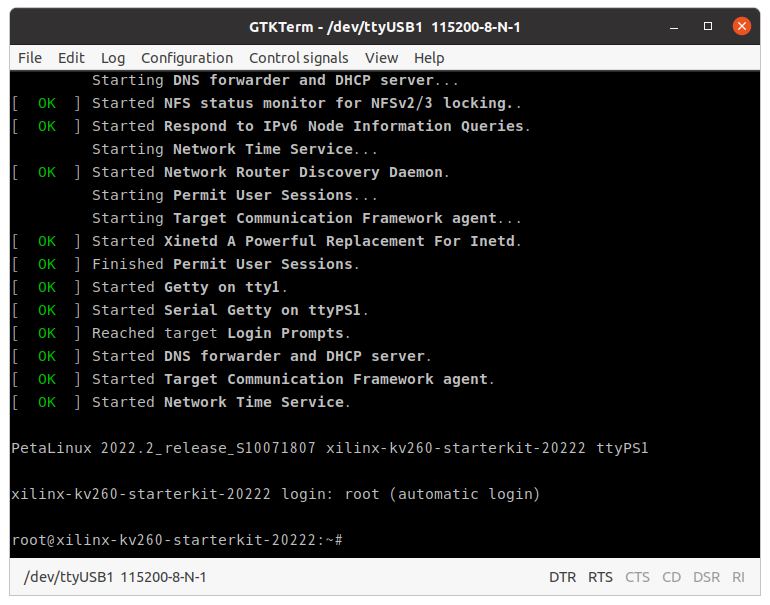
ダウンロードしたイメージで、KV260を起動する。2022.2っぽい

モデルの運用
Model Zooからの浮動小数点モデルのダウンロード
公式のドキュメントだと、typoがあるから注意だ。
[Host PC]
cd ~Vitis-AI
wget https://www.xilinx.com/bin/public/openDownload?filename=tf_resnetv1_50_imagenet_224_224_6.97G_3.0.zip -O tf_resnetv1_50_imagenet_224_224_6.97G_3.0.zip
unzip tf_resnetv1_50_imagenet_224_224_6.97G_3.0.zip
モデルの量子化
イメージをダウンロードする
https://japan.xilinx.com/bin/public/openDownload?filename=Imagenet_calib.tar.gz
[Host PC]
cp Imagenet_calib.tar.gz ~/Vitis-AI/Dockerを起動します。
[Host PC]
./docker_run.sh xilinx/vitis-ai-tensorflow-cpu:ubunt2004-3.0.0.091docker上で、モデルを量子化します。
量子化する前に、config.iniを変更します。
[docker]
vi tf_resnetv1_50_imagenet_224_224_6.97G_3.0/code/quantize/config.iniconfig.initの21行目を5に変更する
export CALIB_BATCH_SIZE=5量子化を行う
[docker]
conda activate vitis-ai-tensorflow
tar -xzvf Imagenet_calib.tar.gz -C tf_resnetv1_50_imagenet_224_224_6.97G_3.0/data
cd tf_resnetv1_50_imagenet_224_224_6.97G_3.0/code/quantize
bash quantize.sh
モデルのコンパイル
KV260をターゲットにする
[docker]
cd ../..
 vai_c_tensorflow -f ./quantized/quantize_eval_model.pb -a /opt/vitis_ai/compiler/arch/DPUCZDX8G/KV260/arch.json -o ./compiled -n resnet50_tf
KV260上での確認
モデルのコンパイルで、できたresnet50_tf.xmodelをKV260に持っていく。自分の環境では、KV260は、192.168.1.89のIPアドレスが割り当てられている
[Host PC]
scp tf_resnetv1_50_imagenet_224_224_6.97G_3.0/compiled/resnet50_tf.xmodel root@192.168.189:/home/root/次に、vitis_ai_runtime_r3.0.0_image_video.tar.gzをダウンロードして、KV260に転送する
https://japan.xilinx.com/bin/public/openDownload?filename=vitis_ai_runtime_r3.0.0_image_video.tar.gz
[Host PC]
scp vitis_ai_runtime_r3.0.0_image_video.tar.gz root@192.168.1.89:/home/root/vitis_ai_runtime_r3.0.0_image_video.tar.gzをKV260で解凍する
[KV260]
cd ~
tar -xzvf vitis_ai_runtime_r*3.0*_image_video.tar.gz -C Vitis-AI/examples/vai_runtime
resnt50を動作させる
[KV260]
cd ~/Vitis-AI/examples/vai_runtime/resnet50
./resnet50 ~/resnet50_tf.xmodel
結果、Exceptionしているけど、実行はされているみたい。ログです。
root@xilinx-kv260-starterkit-20222:~/Vitis-AI/examples/vai_runtime/resnet50# ./resnet50 ~/resnet50_tf.xmodel
WARNING: Logging before InitGoogleLogging() is written to STDERR
I0305 05:44:48.713953  2584 main.cc:292] create running for subgraph: subgraph_resnet_v1_50/block1/unit_1/bottleneck_v1/add

Image : 001.jpg
top[0] prob = 0.983323  name = brain coral
top[1] prob = 0.006626  name = coral reef
top[2] prob = 0.003130  name = puffer, pufferfish, blowfish, globefish
top[3] prob = 0.002437  name = eel
top[4] prob = 0.000897  name = rock beauty, Holocanthus tricolor
terminate called after throwing an instance of 'cv::Exception'
  what():  OpenCV(4.5.2) /usr/src/debug/opencv/4.5.2-r0/git/modules/highgui/src/window_gtk.cpp:624: error: (-2:Unspecified error) Can't initialize GTK backend in function 'cvInitSystem'

Aborted
